Fudge Jumbles

(photo to be added later)

1 C Butter + 2 T(added to the fudge)

2 Eggs

1 tsp Vanilla

2 ½ C Flour

1 tsp Baking Soda

1 tsp Salt + ½ tsp(added to the fudge)

3 C Oatmeal (quick oats or old fashion)

1 15oz can Sweetened Condensed Milk

1 12oz bag of Semi-Sweet Chocolate Chips 

Preheat the oven  350°.  Lightly spray a jelly roll pan or a 13×9 pan.

Cream 1 C butter with sugar.  Add eggs & vanilla. Mix in flour, baking soda & 1 tsp salt & oatmeal.  Blend thoroughly & into a jelly roll or a 13×9 pan, reserving 1 C of the mixture for the topping. 

In a microwave safe Bowl combine the sweetened condensed milk, chocolate chips, 2T of butter and ½  tsp of salt.  Heat for 1 minute, stir and repeat until the fudge mixture is melted.  Poor fudge mixture over the crust and sprinkle with reserved crumbs. Bake for 25-30 minutes – until crumbs and edges are golden brown.

Kombucha Lover

I love Kombucha. I know a couple kids that love kombucha. I know a couple of kids that should drink kombucha, but don’t. They don’t know what they are missing!

I am too cheap to buy this stuff in the store.  I had heard about it and did some research.  So when a friend that I respect encouraged me and offered me starter tea and a SCOBY, I jumped on it.

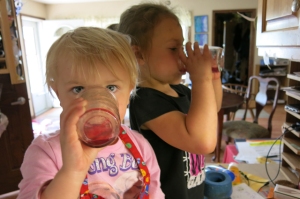
I know a certain sweet girl who loves this stuff and could drink it all day long! The deal is that we have a small glass  after lunch. Today, I realized I am on my last bottle.  I have a sweet boy who likes to sneak some, the reason for my low supply.  I needed to work on the next step and needed a helper.

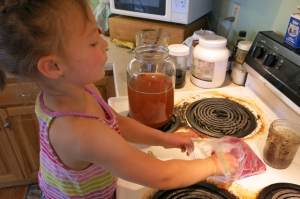
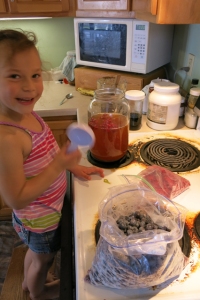
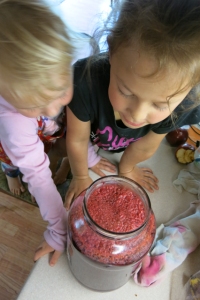
First we tasted the tea before adding the fruit. This is when I take a small teaspoon and taste a tiny bit to know if it is ready for the flavoring step. It is usually yucky tasting to me. (That is why I add fruit.)

My little helper tasted it and loved it. She is one tough cookie!

kombucha tasting

She added raspberries.

Kombucha making 1  Kombucha making 2

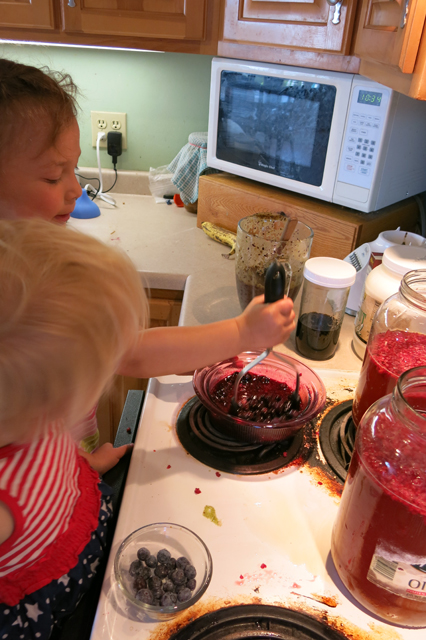
She smashed blueberries and then added them. (If the skin of the blueberry isn’t broken before adding to the tea they don’t give any flavor to the tea)

Kombucha making 3

Nola Mae was more interested in eating frozen blueberries.

Then we let it sit. Taste testing in two days.

kombucha fruit

kombucha fruit tasting


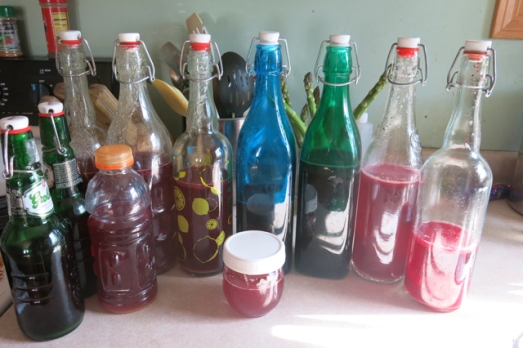
We like fizz, so we bottle ours in swing top bottles.

kombucha bottled


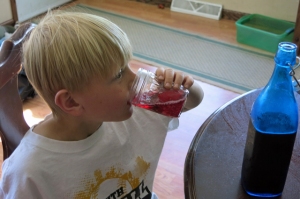
Drinking…

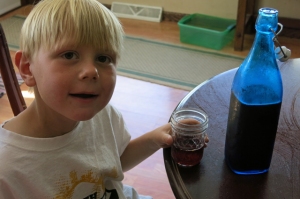
 kombucha henry drinking kombucha Henry

The recipe I follow:

http://www.thekitchn.com/how-to-make-kombucha-tea-at-home-cooking-lessons-from-the-kitchn-173858

An article with the history of Kombucha, benefits and recipe:

http://healthandbeautylifestyle.com/kombucha-tea-of-immortality-recipe/

Birthday Treat for School

dirt cake in jelly jars 3


Charlie has a summer birthday, during the school year he gets to bring a birthday treat to school during the last weeks of school.

Charlie  was inspired by a classmate who brought dirt cake for his birthday treat.  He tells me everyone loves it, even the teacher.

The tricky thing about taking a special birthday treat to school is figuring out how to transport from home to school on the bus.

I want to save this recipe I used for future use, because it really is yummy!

This recipe was easy enough that Charlie did most of it.

Worm Dirt Cake
(Cooks.com modified for Charlie)

2 packages Oreo cookies, crushed

1 (8 oz.) package cream cheese
1/2 C butter, softened
1/2 tsp. vanilla
1 C + a couple of T powder sugar

3 C milk
2 (3 1/2 oz.) packages of instant vanilla pudding (can use chocolate)

Gummy worms and gummy butterflies.
17 – 1/2 pint jelly jars with lids.

Directions:
1.  Crush Oreos, set aside.  Charlie used our food processor.

2.  Cream butter, cream cheese and vanilla. Slowly add the powder sugar. If it is getting too dry/thick, add a drop or two of milk.

3.  Combine milk and pudding mix.

4.  Fold Cool Whip into the pudding.

5.  Fold together the butter/cream cheese mixture and the pudding mixture.

6.  Add approximately 1-2 T of the Oreo crumbs into each jelly jar. Place one gummy worm on top of the crumbs.

7.  Add about 3-4 T of the pudding mixture to the jar, leaving about 1 – 1.5 inch space at the top of the jar.

dirt cake in jelly jars 2

We stopped here and put them in the fridge over night and finished the last steps in the morning.

8.  Cover the pudding with the rest of the Oreo crumbs and top with a gummy worm or butterfly.


dirt cake in jelly jars 4

Homemade Oreo Cookies

Homemade Oreo Cookies

I love Oreos!  I know a few people who also love Oreos.  My friend, Mary, once pointed out to me how bad Oreos are.  I stopped buying them and have missed them!  In one of my late-night emails to our cousin Jessie we discussed our love of Oreos.  She shared with me that she found two different recipes for homemade Oreos.  According to Jessie the best of the two recipes is in the cookbook:  Make the Bread Buy the Butter

Oreos homemade

Make it or buy it? Make it.
Hassle: Yes. Worth it.
Cost comparison: Homemade $0.16 per ounce. Nabisco $0.18 per ounce.

Cookie Ingredients:

1/2 lb. unsalted butter, melted (coconut oil can be a great substitute)
3/4 c sugar
1 teaspoon vanilla extract
1 cup semi-sweet chocolate chips, melted and cooled
1 large egg
1 1/2 cups all-purpose flour
3/4 cup cocoa powder (I used all black cocoa powder so they really looked like Oreos!)
1 teaspoon kosher salt
1/2 teaspoon baking soda

Filling: (I needed 1 1/2 batches of filling)
8 Tablespoons unsalted butter, softened
1 2/3 cups confectioners’ sugar
1 teaspoon vanilla extract
1 Tablespoon milk
pinch of salt

1) In a mixing bowl, whisk together the butter & sugar. Add the vanilla & chocolate. Beat well. Add the egg and beat some more.

2. Sift together the flour, cocoa powder, salt, & baking soda. (I own a sifter and am too impatient to use it and it seemed fine) Pour remaining powder into the bowl & whisk to combine. Stir this into the chocolate mixture. It will look like a mistake – a tacky, fudgy brown mess. Don’t worry. Let it rest for 20 minutes at room temperature to firm up. (cover dough with plastic wrap to avoid drying up)

3. Transfer the dough to a piece of waxed paper. Shape it into a long log – about 22 inches long and 1 3/4 inches in diameter the dough is sticky but if you briskly & lightly roll it back & forth on the waxed paper, you will end up with a log. If the dough starts to stick to the paper, transfer it to a new piece of waxed paper. Once you have a log of dough, try to make it as smooth & even as you can. You are trying to replicate cookies made by a machine. Refrigerate the waxed paper covered log of dough for a few hours, or overnight, until very firm.

4. Heat oven to 325 degrees F. Butter a baking sheet or line it with parchment paper. Cut the dough into scan 1/4-inch slices. Place them on the cookie sheet. They can be as close as 1/4 – inch apart so pack them on there. (My first pan I did 1/4 in slices and they ran together, my next batch I cut much smaller – Oreo cookie size and then I could pack them on but they needed less baking time)

5. Bake for 20-25 minutes (Mine were done sooner at 12-15 min) until they’re cakey but firm when you press with the tip of your finger. Cool completely on a rack.

6. To make the filling: Beat all the ingredients together until perfectly smooth. Spread onto the cooled cookies, about 2 teaspoons per cookie. Store the cookies at room temperature in a cookie tin for up to five days.

Makes 2-3 dozen.

Nola Mae approves of these cookies.  When Jack tasted the cookies he asked me, “Did
you really smash Oreos just to make these frosted cookies?”

oreo cookies Nola Mae

Milk Making Cookies

Milk Making Cookies

These can be eaten by non-lactating people!

IMG_0970

When I was having trouble producing milk for Nola Mae I found this cookie recipe.  I never made them when I “needed” them.  I was too stressed out to do any extra things at the time.   I breastfeed her more often and took fenugreek to increase my milk supply and that worked.

My sister-in-law recently had a baby and I thought it would be fun to give her some of these cookies.  I finally made them!   I forgot the chocolate chips at first so some were made without chips, which my 3-year-old nephew enjoyed.

I made a few changes to the orignal recipe (rearranged the order of the list of ingredients for easier making, added more cinnamon and used peanut butter and coconut oil).  I didn’t add nuts because I rarely cook with nuts and really didn’t know what kind to add.  I thought about chopped garbanzo beans because I have done that before.

What kind of nuts would you add?

Milk Makin’ Cookies
 (http://www.drmomma.org/2010/08/major-milk-makin-lactation-cookies.html)
Ingredients:
1 1/2 c. whole wheat flour
1 t baking soda
3 t cinnamon
1 t salt

3/4 c. peanut butter
1/2 c. coconut oil (or butter)
1/2 c. sugar
1/2 c. brown sugar
2 t vanilla
3 T brewer’s yeast
1 c. ground flax-seed
1/3 c. water + about 2 -3 T

2 large eggs

1 3/4 c. rolled oats

2 c. (12 oz) chocolate chips
1 c. nuts (optional) or maybe chopped garbanzo beans

Directions:
Combine flour, baking soda, cinnamon and salt in a bowl.
In a large bowl, beat peanut butter, coconut oil, sugar, brown sugar, vanilla, brewer’s yeast, flax and water until creamy.

Mix in eggs.

Gradually beat in flour mixture. Slowly mix in oats. Mix in nuts and chocolate chips.
Place Tbsp.-sized balls of dough onto greased cookie sheets. Press down each ball lightly with a fork.

Bake 12 minutes at 350F. Allow to cool.

Freeze already made cookies or dough for eating and baking later.

Cake Decorating

Cake Decorating

I come from a family that cooks and bakes.  My mom always decorated a beautiful cake for our birthday.  I baked Jiffy box cakes with my Grandma (Nola) Fabian when I was a kid.  My hubby’s Aunt Mary always designed and decorated cakes from her kids’ request or interests at the time.  One memorable cake of Aunt Mary’s was of a pool with the swim lanes, starting blocks and flags for her daughter Jessie who was on the swim team.

Between my mom and Aunt Mary I was inspired to do the same thing for my children.  I took a Wilton Cake Decorating Class at my local craft store.  I learned a lot of different techniques and tricks using frosting.

I never have considered myself creative or artistic, since I started decorating cakes I have come to think that my frosting could be like paint.  And some day I could paint a master piece.  Until then I will make edible master pieces.

The baking part is very easy.  I am now admitting to the world that I use a box mix for most of my cakes.  I feel like I have more time to make each cake beautiful if I use a box mix.   I have made a few cakes from scratch and they aren’t as moist and yummy as the box mixes.  I recently needed to make a yellow cake from scratch and it was delicious and not too much extra work!

Once my frosting colors are decided I divide up my frosting.  And it sometimes looks like an artist’s work area.

Crumb coating is a time-saving technique and I use it with almost every cake.   Click here to see a demonstration on YouTube.


In second grade Robbie had a VIP day.  This is where the parents can come to the class to share something special about the family or talk about what they do for work.  Robbie and I decided that we would have his classmates decorate their own cupcake.  I made lots of frosting and put them in bags.

One of Robbie’s classmates loves volcanos and tornadoes.  He decorated his cupcake as if it was a volcano and it measured about 4 inches tall.

My Favorite Cakes:

I made this cake for my future sister-in-law, BJ’s, bridal shower.  My brother and BJ enjoy gardening and they had a little pond in the corner of their yard.

This was for Henry’s 2nd birthday.  He loves chickens and he loved our cow Vanilla.

I made this cake for our family reunion.

This is Henry’s 3rd birthday cake.  I spent so much time coloring and baking the insides I just couldn’t do anything special on the outside.

My Prettiest Cakes:

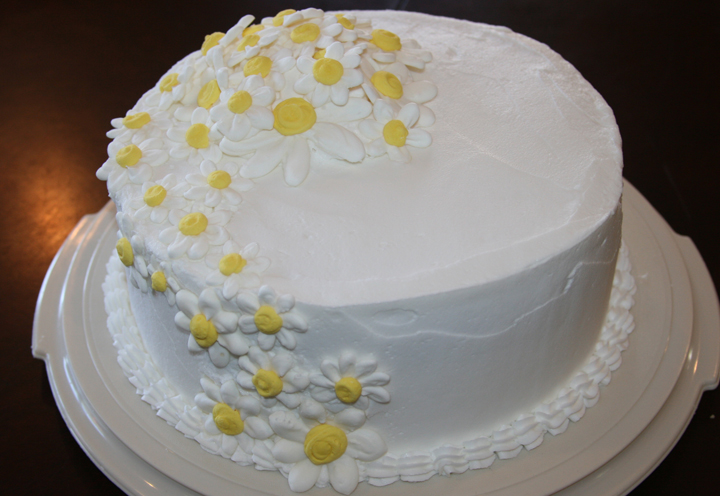
This cake was made in for the cake decorating class that I took.  My first time doing roses and a bow.

My Only Wedding Cake:

I decorated this cake for my brother’s wedding.  The mothers of the bride and groom baked the cake together.

Anniversary Cake:

My Ugliest Cakes:

Robbie’s request for his 6th birthday was for a chicken, chicks and a pumpkin.

This cake was made for an ice fishing weekend with Jack’s college friends.

My Baby Shower Cakes:

My Nightmare Cake:  I made this beautiful cake for a dear friend’s son and daughter-in-law’s baby shower (they knew they were having a boy).  The decorating went very well I didn’t stress too much about colors or the design.  Because this was my third time with the similar design.  The only challenge was to find time to decorate.  I worked on it after the boys went to bed and finished it during their nap time.  My plan was to deliver it the evening before the shower, approximately 10 miles away.  Here is the part that puts this cake into the “nightmare” category…as I was turning into the driveway of my friend’s house (thankfully her driveway is long and she didn’t see me pull in) the cake platter slipped off the seat and the cake tipped into the back of the seat.  Not falling on the floor (thankfully) but destroying my design and cracking the cake in half.  Believe me there was lots of tears and swearing and throwing frosting out of the car.   I went home called my friend to tell her that I was unable to deliver the cake that evening and hoped it would be okay if I took it directly to the church the next day.  I had another night of lost sleep making more frosting and redecorating the cake.   NEVER travel in a car with your decorated cake out of sight!!!  Since this cake, all the cakes I deliver ride on the front seat, I prefer to have all my cakes picked up, and I ALWAYS make sure a cake leaves my driveway in the front seat or on someone’s lap.


My Religious Cakes:  

My Birthday Cakes:

My Adventurous Cake:

I made this one for my cousin, Libby’s, birthday.  She is a very adventurous woman.   

My Hardest Cake:

Tricky was our first rooster.  Robbie loved him and when we would feed him worms through the fence Tricky would jump very high to get the worms and it looked like he was doing tricks for us.   I surprised Robbie for his 5th birthday with this cake.

My Easiest Cakes:

This is the picture on a t-shirt that our midwives give to each family they work with.  Some t-shirts say “born at home” and if the baby was born in the hospital, assisted by the midwives, the shirt says, “born into loving hands.”  I made this cake for an annual party our midwife has on her farm.


My Cupcakes:

I made this one for a bluebird party I had at my house.

These were for Robbie’s birthday treats at preschool and the week’s theme was “emotions”.

Everything Breakfast Bars

Everything Breakfast Bars

Prep: 20 minutes  Bake: 15 minutes

Makes: 24 large bars or 40+ small bite size bars

(I have adjusted this recipe from the original recipe. I am sorry I forgot what recipe book I got this from.)

3 eggs, lightly beaten

1/4 C + 1 T vegetable oil

5 T water

2 T honey

2 T dried milk

1  14 oz package of fat-free banana muffin mix

1 1/2 C quick oats (or 2 C round toasted oat cereal)

1 C crispy rice cereal

1 C low-fat granola

1 C semi-sweet chocolate chips

1/2 C sliced almonds

3 T organic shelled hemp seeds (optional)

1/4 C dried cranberries

1/4 C dried blueberries (optional, increase cranberries)

1. Preheat oven to 350.  Line a 13X9x2 inch baking pan with foil, extending the foil over the edges of pan.  Lightly coat the foil with cooking spray; set pan aside.

2. In a large bowl combine eggs, oil, honey, dried milk and water.  Stir in remaining dry ingredients.

3.   Transfer mixture to the prepared baking pan.  Use the back of a large spoon, press mixture evenly onto the bottom of the pan.

4.  Bake for 15 to 18 minutes or until the edges start to brown.  Cool in a pan on a wire rack.  Using the edges of the foil, lift baked mixture out of the pan.  Cut into bars.

The nutritional info for original recipe – 24 bars:  168 cal, 6g fat (2g sat. fat) 18mg chol., 181mg sodium, 27g carb., 2g fiber, 3g protien.

 Another recipe for “Everything Breakfast Bars” that I will have to try:

http://smittenkitchen.com/2008/09/raspberry-breakfast-bars/

Applesauce Friut Leather

Applesauce Fruit Leather

I love making applesauce in the fall.  This past fall I had a great helper!


Our boys love eating my applesauce until I feed them too much of it they get sick of it.  When they got sick of it last year I made some fruit leather with some of the leftovers in my dehydrator.  The boys didn’t like the fruit leather very much, I did!  

This winter I did an inventory of my canned applesauce.  I found I have tons of applesauce!   

I decided to try the fruit leather again.    I found some canned applesauce with chunks of apples (boys don’t like chunks), applesauce with strawberries (boys didn’t like that combo) and applesauce with raspberries (they didn’t like that combo either).

I have plastic liners for my trays.  My friend uses wax paper in place of the trays.  You can also use plastic wrap.

I had the best results with about 1/4 inch thickness of applesauce on the tray’s liner.

The owner’s manual directions said 135 degrees for 8-10 hours.

At eight hours the applesauce was like fruit leather but still a little too moist.  The directions in my manual said to cut it while it was still warm.  I used a pizza cutter.  The spatula was helpful in scraping the fruit leather of the plastic tray liner.

Because of the apple chunks I dried the fruit leather after the cutting for another 30 minutes to 1 hour.  Some slices were dry enough and didn’t need the extra drying time.


If I am remembering correctly a pint jar yielded one tray.

Other recipes/directions I found on-line:

Simply Recipes: Fruit Leather in the oven 

Heavenly Homemakers:  peach fruit leather

makeandtakes.com:  Apricot Leather dried in the sun

skiptomylou.org: Strawberry Fruit Leather (same directions as Apricot)

Zucchini Chocolate Chip Cookies

Zucchini Chocolate Chip Cookies
(from Barbara Kingsolver’s Animal, Vegetable, Miracle A Year of Food Life)

Zucchini Chocolate Chip Cookies

This is one of the reasons why I grow zucchini. I shred it with my cheese grater and freeze them in 1 cup amounts.

I usually make a double batch because our boys love them so much.  And so do I!

When I double the recipe it seems like there are too many chocolate chips. Is that really possible?

(Makes about two dozen)
1 egg, beaten
½ cup butter, softened
½ cup brown sugar
1/3 cup honey
1 tbsp. vanilla extract
Combine in large bowl.
1 cup white flour (I add 1/2 c more flour)
1 cup whole wheat flour
½ tsp baking soda
¼ tsp salt
¼ tsp cinnamon
¼ tsp nutmeg
Combine in a separate, small bowl and blend into liquid mixture
1 cup finely shredded zucchini
12 oz chocolate chips
Stir these into other ingredients, mix well. Drop by spoonful onto greased baking sheet, and flatten with the back of a spoon. Bake at 350°, 10 to 15 minutes.

To see other recipes from her book click here.  If you haven’t read her book you should! It is one of my favorite books!

The Best Smoothie

My best friend, Bethany, from college taught me about smoothies and now I frequently make smoothie for our night-time snack.  I never use a recipe and never keep track of my ingredients.  My standard ingredients are yogurt, milk and bananas. The rest is whatever frozen berries are in the upstairs freezer at the time.

Only a few times the boys did not like a smoothie I made. When a smoothie does flop I freeze it in my ice-cube trays and throw a few cubes into future smoothies.  Or I cut the cubes in thirds and Henry eats them for snacks during the day.   I also do this with any leftover smoothie.

Last night’s smoothie was a huge hit.  I was able to remember or estimate what my amounts were to write this down.
 THE BEST SMOOTHIE

3 bananas (you can also use frozen bananas)

1 cup milk

2 cups of vanilla yogurt

1/2 cup frozen strawberries

1/2 cup frozen raspberries

1 cup frozen blackberries

2 tablespoons of hemp seeds

Blend and serve.  I believe this made about 5 cups (1.25L).

My reviews on this smoothie were the most postive I have heard.   Here is what my critics had to say:

Robbie – This is GREAT!  THE BEST EVER smoothie!


Charlie – Mama, you should sell these!


Henry – YUMMY!


Jack – Very good! ( sorry I didn’t get a photo of his dirty face)

About Hemp seed:  http://www.drbronner.com/pdf/hempnutrition.pdf

Smoothie books that have inspried me (photos taken from amazon.com):

Super Smoothies: 50 Recipes for Health and EnergySuper Smoothies: 50 Recipes for Health and Energy

500 Smoothies & Juices: The Only Smoothie & Juice Compendium You'll Ever Need (500 Cooking (Sellers))500 Smoothies & Juices: The Only Smoothie & Juice
Compendium You’ll Ever Need

Green for LifeGreen for Life